Installation Guide
Find in this document the different steps to install your Vitre
Installation steps
1. Mount the TV stand
2. Attach the screen to the TV stand
3. Setting up the sound bar
4. Attach the sound bar
5. Install the Kit la Vitre in the TV stand, and run the cables properly
Just below, the final rendering and all the information
👇👇👇
The Bundle
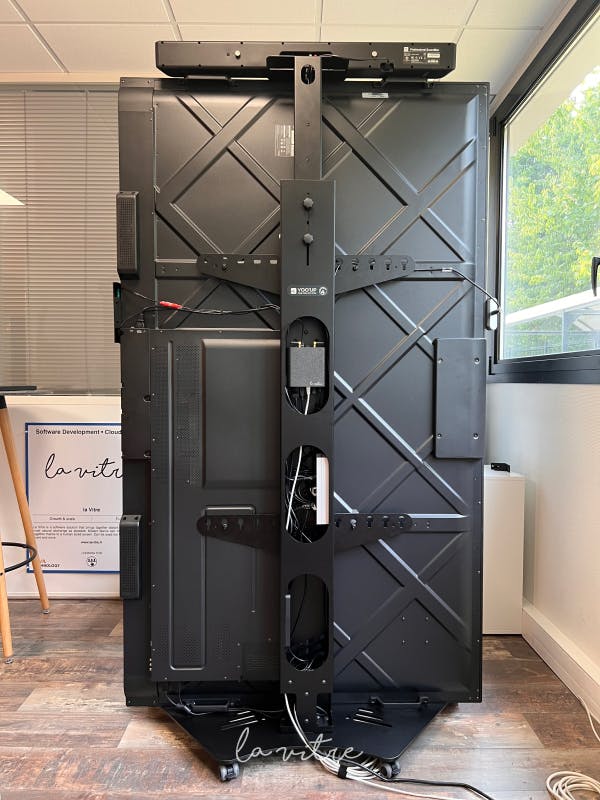
View from the back
You can see the position of the different elements :
- MiniPC on VESA plate
- The cables
- The sound bar
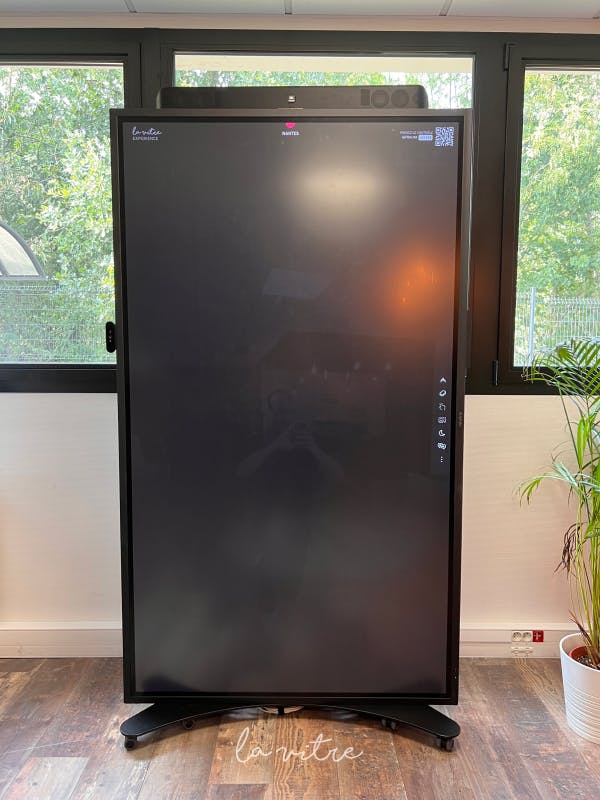
Front view
Your Bundle la Vitre,
assembled and ready to use 🎉
Contents of the Kit la Vitre

MiniPC, Power supply, VESA plate
Camera, Microphone, Metal Sticker, fastening screws
Step 2 Attach the screen to the TV stand
The height of the VESA supports depends on the screen model

Step 3 and 4 The sound bar
The soundbar is delivered with its power supply, an audio cable, two mounting brackets, two plastic covers and a remote control


You must set the switches to Variable Source and Max Volume, then close the cover with the screw provided
On the top of the sound bar, you have to hide the buttons with the provided cover
Then install the sound bar on the sound bar holder on the TV stand with the bracket provided
Once steps 1 to 4 are completed
Now it remains to come to fix and connect the elements of the Kit la Vitre.
The Mini PC comes to be fixed in the column of the TV Stand, thanks to its VESA plate.
Then the Camera and the Micro on both sides of the screen, thanks to the metal stickers.
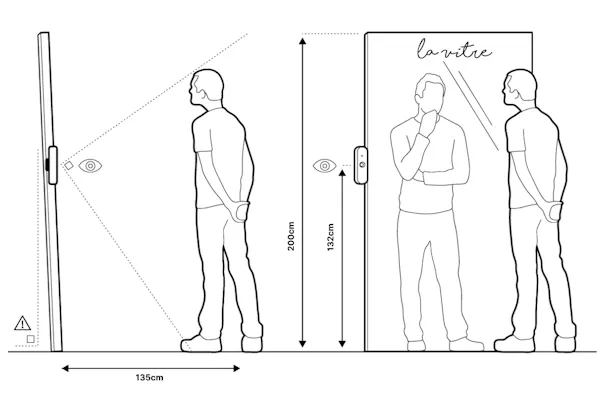
The rule is simple 😊
•••
132cm from the ground
•••
Camera on the left
•••
Microphone on the right
👇👇👇
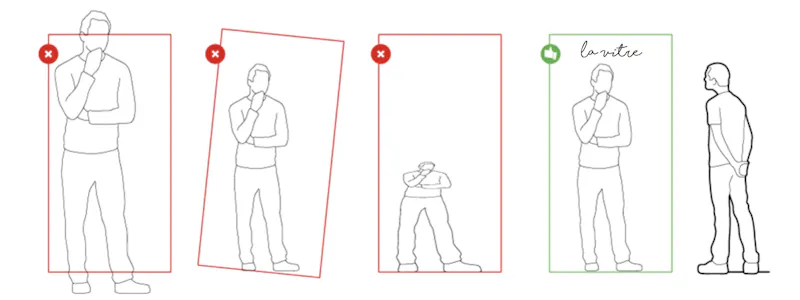
The Webcam

Fix the metal sticker on the left side of the screen, 132cm from the ground, Flush with the edge of the screen

Thanks to its case, the Camera is attached with a magnet

Et voilà !
The Mic

Fix the metal sticker on the right side of the screen the center must be 132cm from the ground

Thanks to its case, the Mic is attached with a magnet
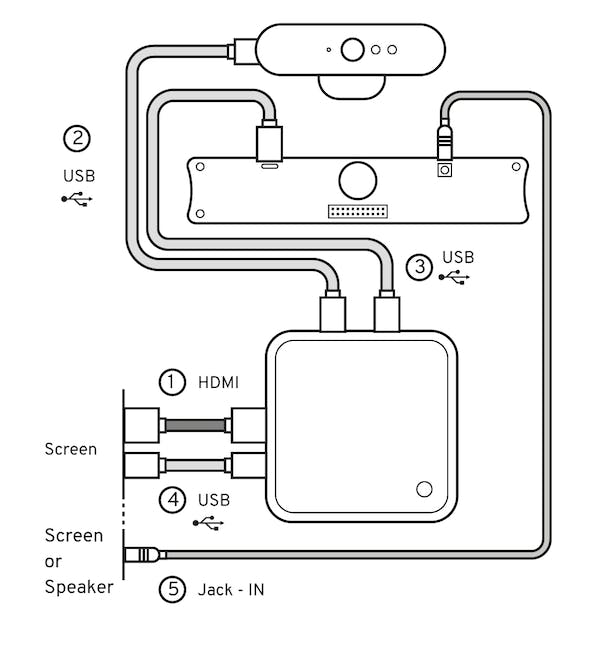
The connections
1- Connect the screen to the MiniPC (HDMI cable)
2- Connect the Camera to the MiniPC (USB-C / USB-C cable)
3- Connect the Microphone to the MiniPC (USB-C / USB cable)
4- Connect the "Touch Out" of the screen to the MiniPC (USB / USB-A cable)
5- Connect the Microphone to the speaker or amp (3.5mm audio cable)
Everything is good?
So now you can turn on the screen and the MiniPC, Connect the computer to your network,
then enter your activation key.
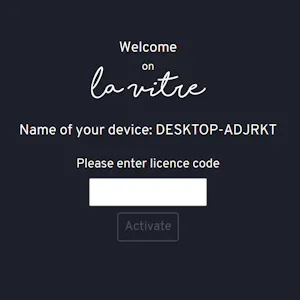
Here we go 🎉