Connect an AI to the la Vitre MCP
✨ An AI assistant such as Claude or Notion AI can create, deploy and update your la Vitre team's apps, with no developer involved. It connects to the la Vitre MCP (Model Context Protocol), the interface la Vitre opens to AI assistants.
This page explains how to give a team member that right, then how to connect Claude or Notion AI with their la Vitre account, or another tool with an API key.
What you need
- Access to the admin portal: admin.lavitre.me/next/. Custom roles are managed in this version of the portal.
- The right to manage the team's members and roles (administrators have it).
- Storage configured for the team (Team settings → Storage): this is where the AI puts the apps it deploys.
- The address of the la Vitre MCP:
https://svc.lavit.re/mcp
1. Create an “AI agent” role
Team administrators can already connect an AI. To let another member do it without making them an administrator, create a dedicated role:
- In the menu, open Team settings → Roles, then click Create a role.
- Give it a name, for example AI agent. The identifier fills itself in.
- Unfold the Team group and tick Deploy apps (connect an AI client to the MCP). This is the right that allows connecting an AI.
- Optional: in the Spaces group, tick View spaces so the AI can list the team's spaces.
- Click Create the role.
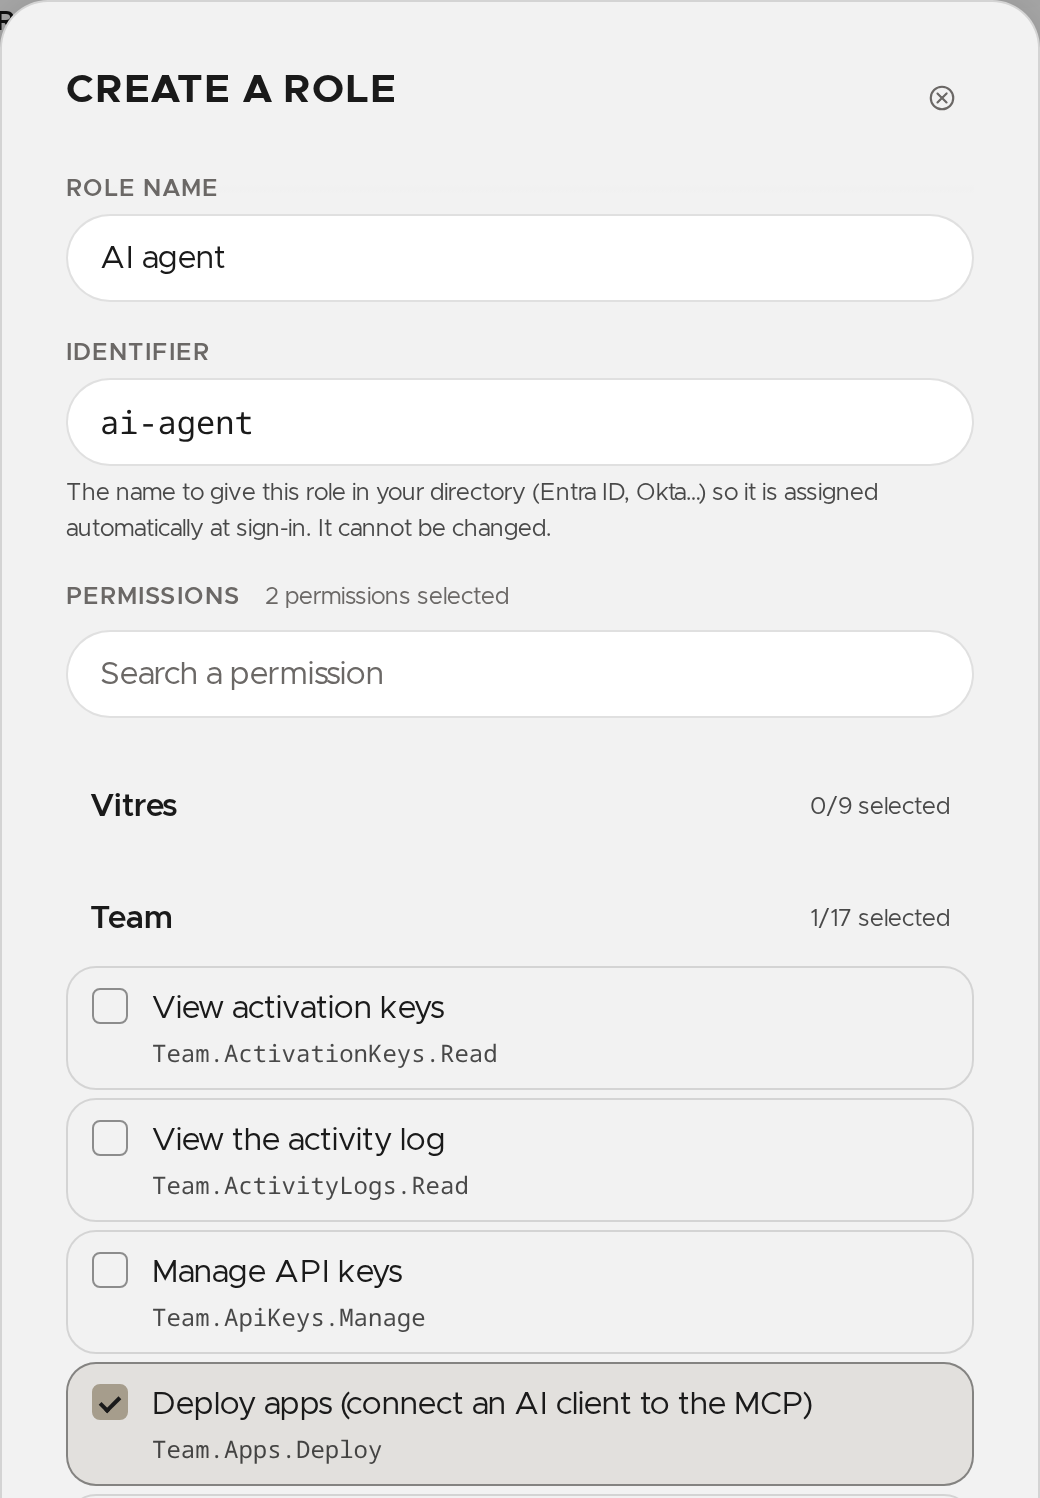
💡 An AI connected by a member can do nothing more than that member's role allows. With only “Deploy apps (connect an AI client to the MCP)”, it deploys apps but cannot, for example, change a space's catalogue.
2. Give the role to the member
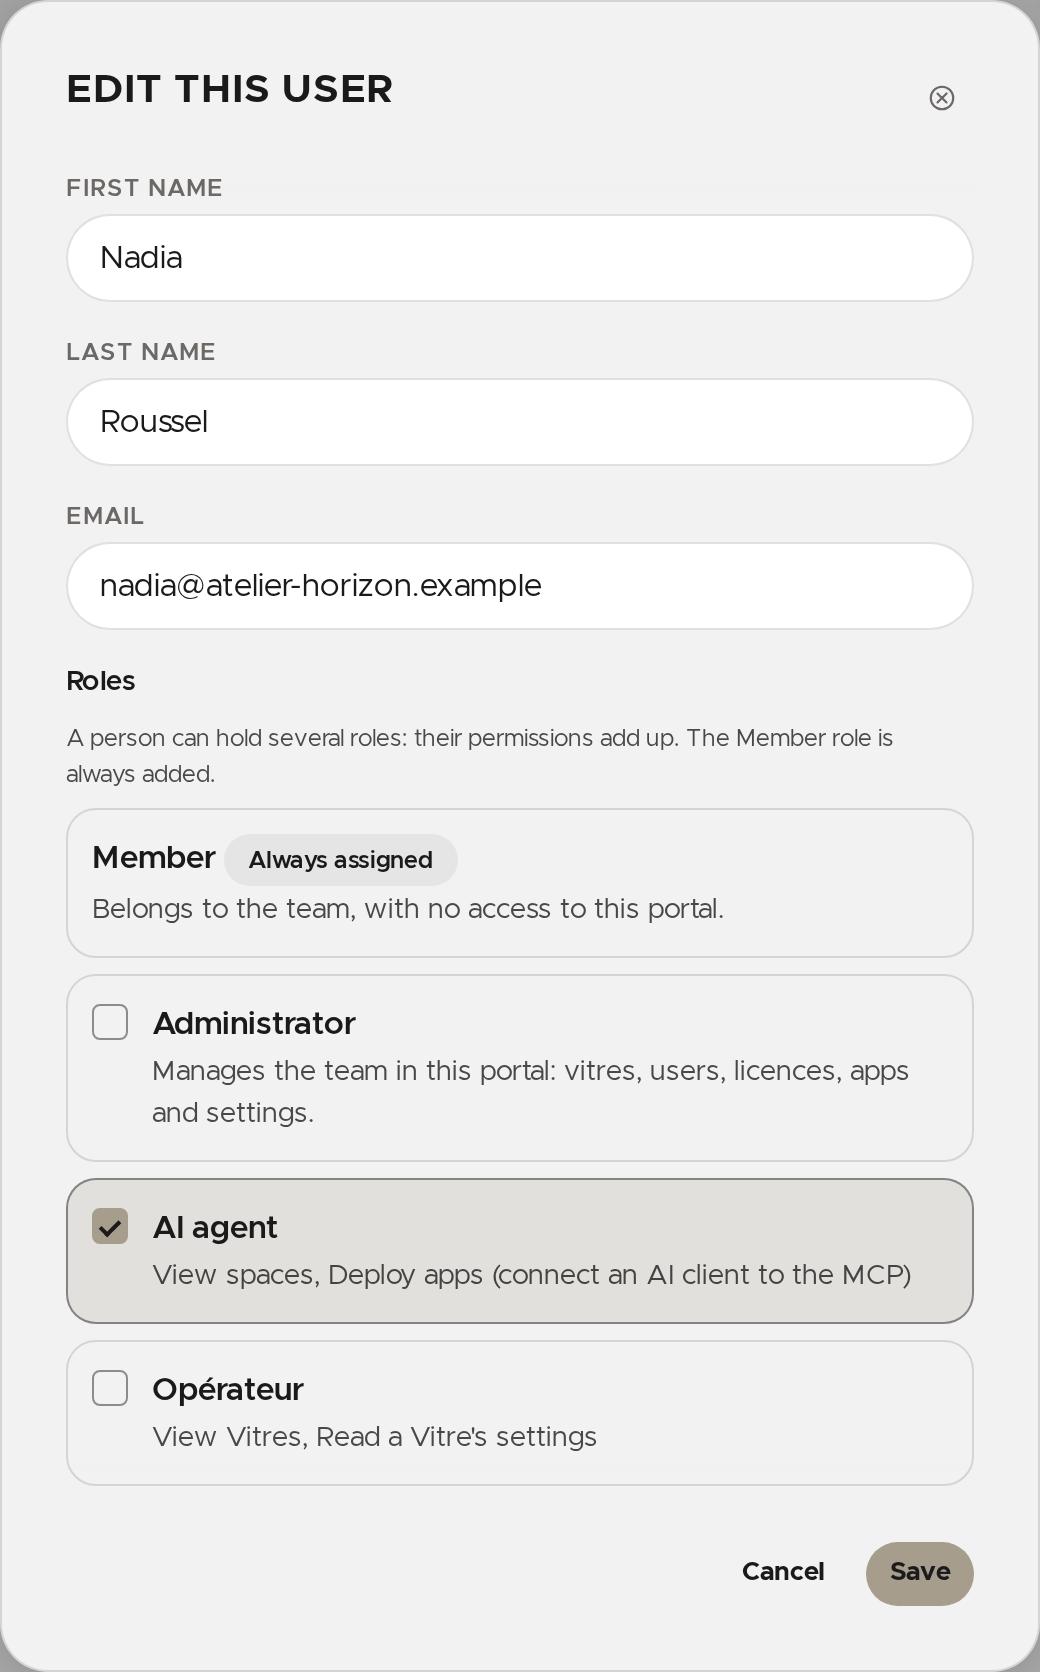
- Open Users.
- On the member's row, click Edit.
- Tick the AI agent role, then click Save.
3. Connect Claude
Claude connects with the member's la Vitre account: there is no key to copy.
On claude.ai
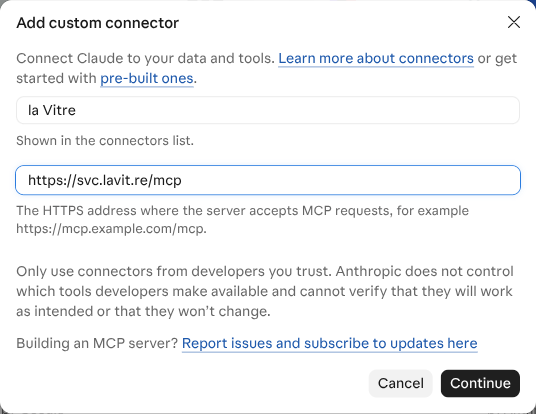
- In the left menu, open Customize, then the Connectors tab.
- Click Add, then Add custom connector.

- Give it a name, for example la Vitre, enter the address
https://svc.lavit.re/mcp, click Continue and finish adding it.
- Connect the connector: a la Vitre sign-in page opens. Sign in with your e‑mail address or your SSO provider.
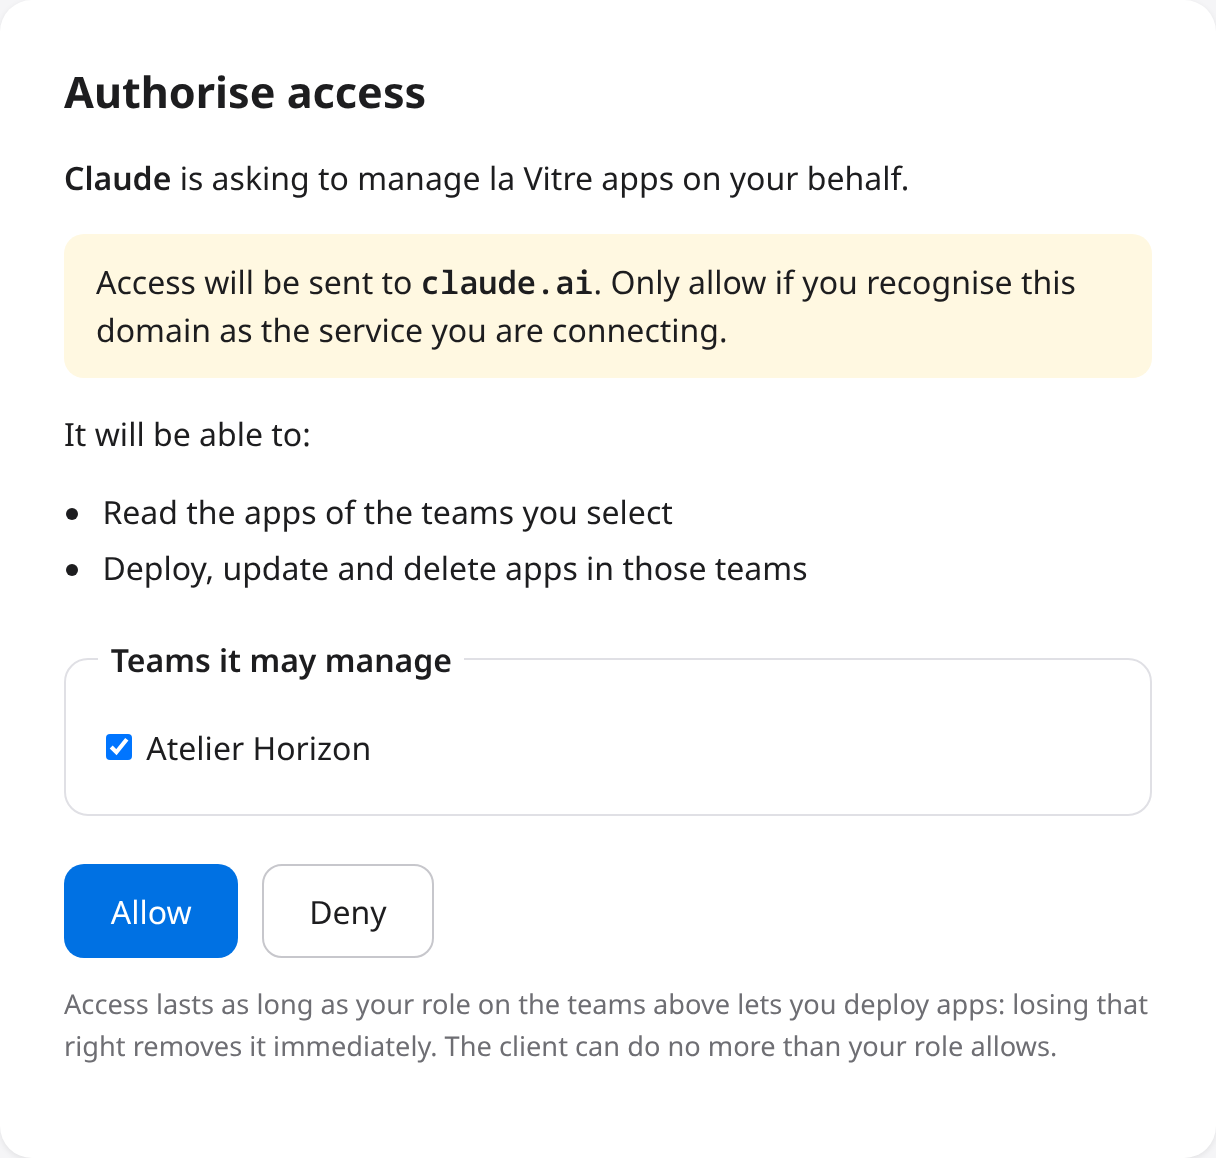
- The Authorise access screen appears. Check that access will be sent to
claude.ai, tick the teams Claude may manage, then click Allow.
In Claude Code
claude mcp add --transport http lavitre https://svc.lavit.re/mcp
On the first call, Claude Code opens your browser on the same sign-in page and the same authorisation screen.
⚠️ Only the teams where your role carries the “Deploy apps (connect an AI client to the MCP)” right are offered. If the screen says there is nothing to grant, ask an administrator of your team for that role.
4. Connect Notion AI
Notion also connects with the member's la Vitre account.
- In Notion, open Settings → Connections.
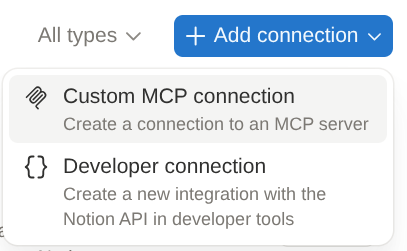
- Click Add connection, then Custom MCP connection.
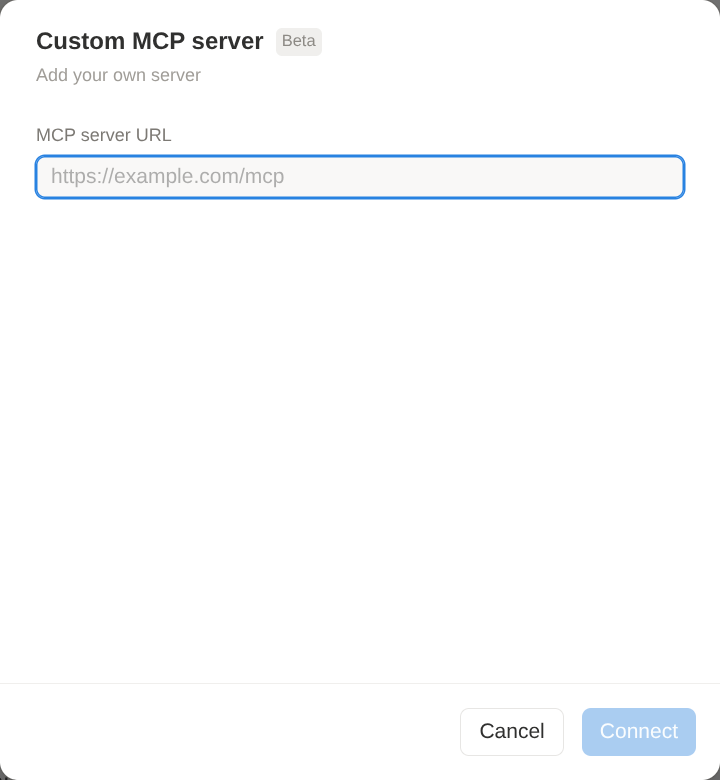
- Enter the address
https://svc.lavit.re/mcpin MCP server URL, then click Connect.
- The la Vitre sign-in page, then the Authorise access screen appear, as for Claude. Check that access will be sent to a Notion domain, tick the teams, then click Allow.
💡 Custom MCP servers are a beta feature of Notion. Depending on your workspace's plan and settings, adding one may be reserved to its administrators.
5. Other tools: an API key
A tool that cannot sign in with an account (a script, another MCP client) authenticates with a team API key. A key belongs to one team and to no person: keep it secret.
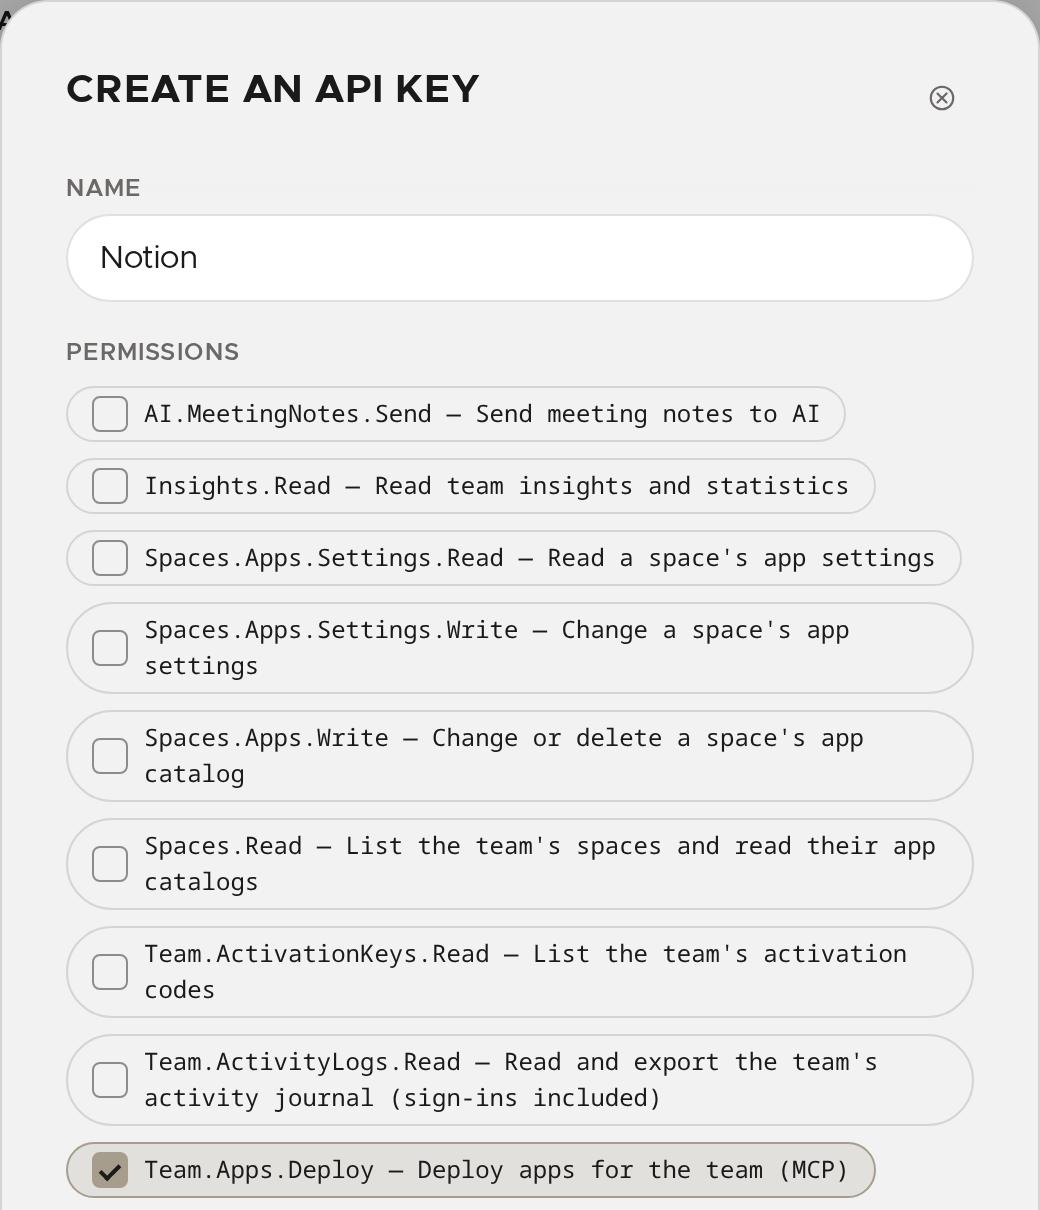
- Open Team settings → API Keys, then Create an API key.
- Name it after the tool that will use it.
- Tick
Team.Apps.Deploy. AddSpaces.Readif the tool must list the spaces. - Optional: restrict the key to some IP addresses, or set an expiration date.
- Click Create.
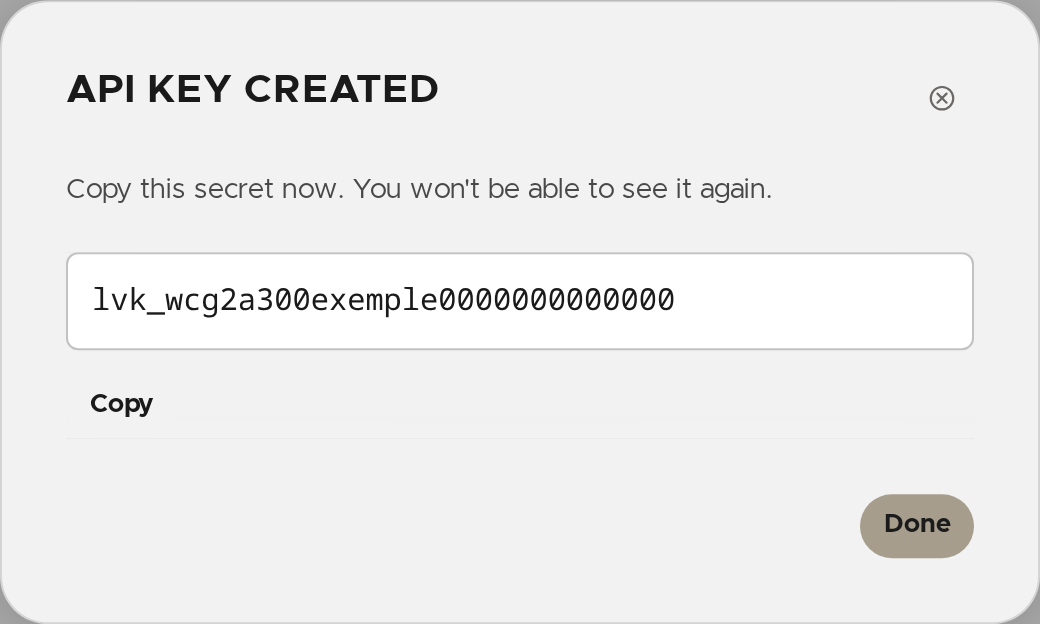
- Copy the secret shown: you will not be able to see it again.
- In the tool, enter the address
https://svc.lavit.re/mcpand the headerAuthorization: Bearer <your key>.
Security: staying in control
- Remove a member's access: take the AI agent role away from them, or untick “Deploy apps (connect an AI client to the MCP)” in the role. Claude and Notion lose access on their next request.
- Disconnect a tool: remove the connector in Claude or the connection in Notion; for an API key, delete it in API Keys.
- Follow the activity: the team's Journal records the access granted to AI clients and every deployment, with the person or the key behind it.
Troubleshooting
| What you see | What to do |
|---|---|
| The authorisation screen offers no team | Your role does not carry “Deploy apps (connect an AI client to the MCP)”: ask an administrator for the AI agent role. |
The AI answers forbidden_team |
The right was removed, or the team was not ticked when you authorised: reconnect the connector. |
The AI answers missing_permission |
The action needs a right your role (or the key) lacks, for example “View spaces”. |
The AI answers storage_not_configured |
Configure the team's storage in Team settings → Storage. |
| A tool using an API key gets a 401 or 403 error | The key has expired, was deleted, or does not carry Team.Apps.Deploy. |
✨ Missing information?
This Help Center evolves with your needs.Let us know which terms, features, or use cases should be clarified, or contact support for personalized assistance.
Bringing you closer to what matters. We are enriching this resource together.